
Making a hollow wooden surfboard


Crafting the EcoDroplet:
It’s a slight change from my previous Linseed Oil & Beeswax finished boards, as I’m experimenting with ply hull and decks, and cedar rails, and a Super Sap eco epoxy resin finish. Some of my newer boards are made using a slightly different technique which saves weight and reduces waste. These more recent boards have a single concave blending to flat rocker in the tail. For images of current projects check out my Facebook page or on Instagram
Stage 1. Design the profile and rocker shape
Stage 2. Print out full scale as a poster print and sick sheets together to create full size template
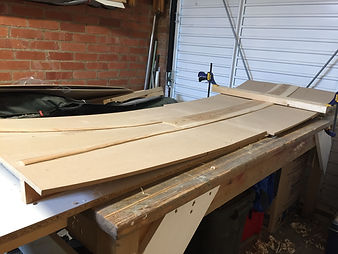
Stage 3. Use template to mark out on the deck material. Then cut out with jigsaw (you might have noticed that since moving house, my workshop/garage is about half the size of the old one and very cramped!)
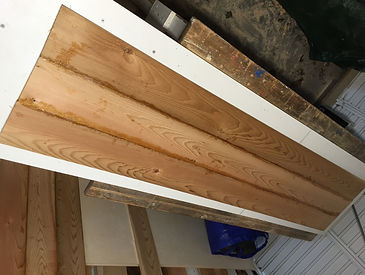
Stage 4. Glue up the planks of cedar with the epoxy resin. Sand down.
Stage 5. Work out the shape and placement of the rails to be cut out. Taking into account where the volume of the surfboard is wanted. i.e. more to the front or rear of the board.
Stage 6. Mark out the rails and cut with a jigsaw
Stage 6. sand down the rough edges of the rail strips
Stage 7. Build your jig to create the desires rocker shape. The ‘Droplet’ is a single concave in the nose and centre section of the board, transitioning to double concave in the tail.
Stage 8. Finish off the jig. Make it strong!


Stage 9. lay up the first pair of rails and glue up using the SuperSap resin. Follow their instructions on the mix ratios, etc
Stage 10. Clamp carefully to creating a good bond and start to form the rocker shape.
Stage 10. Notice the concave rocker in the image.
Stage 11. Once glued you’ll be left with a blunt end on the rail.
Stage 11. Plane each of the ends of the rails strips to bend it into the hull skin, ready for the next rail layer
Stage 12. Bond the next pair of rails onto the board and clamp along it’s length in various locations as before
Stage 13. Once bonded, plane and sand the ends to blend into the hull skin as before.
Stage 13. Repeat this for each layer until you’ve built up your desired thickness


Stage 14. Ensure the when clamping, you get an even pressure along the whole length of the rails
Stage 15. Also clamp the tail section around the former, to create the double rocker in the tail
Stage 16. Continue building up the rail section, one layer at a time

Stage 17. Once all the rail layers are glued in place, timber is added to allow the fitting of the fin plugs and tail plug
Stage 18. 8mm square strips with a 3mm slot are bonded onto the hull, to increase the strenght of the rocker shape


Stage 19. Small sections of 3mm marine ply are then cut to size and bonded onto the 8mm strips already attached to the hull.
Stage 20. A further 8mm slotted strip of cedar is then cut to size and bonded to the top of the ply. However, I've use different core structures on my later boards.


Stage 21. Internal support is added in the nose section to increase the thickness of the material in the nose, to accomodate the vent plug.
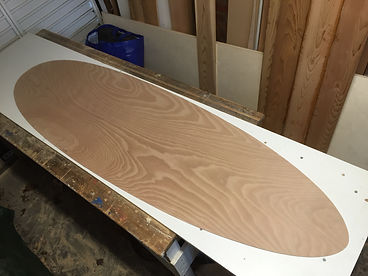
Stage 22. Deck skin is marked up ready to be bonded on to the board. Epoxy coating is applied to the internal face.
Stage 23. Calculation are made to work out the amont of material that can be removed to shape the rails

Stage 24. Once everythings glued up, you can start cleaning off the excess epoxy and shaping the rails

Stage 25. Spend as long as you need fine tuning the rails and sanding back - from 80grit all the way to 1000 grit.

Stage 26. I decided to drill out the deck and fit the vent, & tail plugs on this board before glassing. Probably won't do that again though!?


Stage 27. Next step glass the board in BioSuper Sap Epoxy resin. Note: theres no need for glass weave, as all the strength of the board is in the timber.
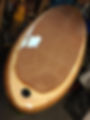
Stage 28. After glassing, the FCS compatible fin plugs are added, and the board polished and buffed

